Wednesday, September 2, 2009

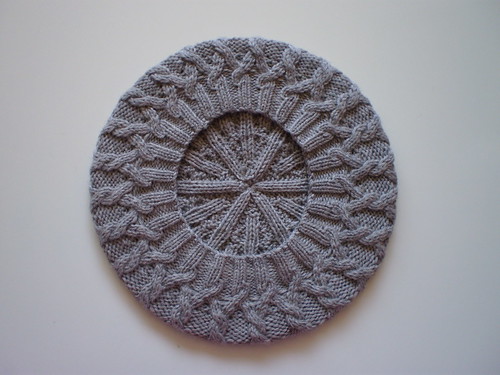
Gretel


Name: Gretel
Pattern: Gretel by Ysolda Teague
Craft: Knitting
Made for me :o)
Size: Middle size (blocked to 10.5 inch diameter)
Start date: August 27, 2009
Completed date: August 30, 2009
Needle size: US 3 / 3.25 mm and US 7 / 4.5 mm
Yarn: Cascade Yarns 220 Heathers
How much? 1 skein = 220 yars (201.2m)
Colorway: 8401 Silver Grey
See it on Ravelry!


Made this with the leftover from my Almeara gloves. Beautiful hat, I love all the cable-y goodness! I have been wanting to knit this for awhile and the finished product is everything I had hoped for. Can't wait for the weather to get cooler so I can start wearing this!
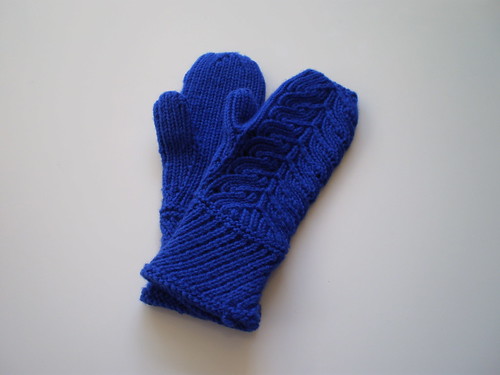
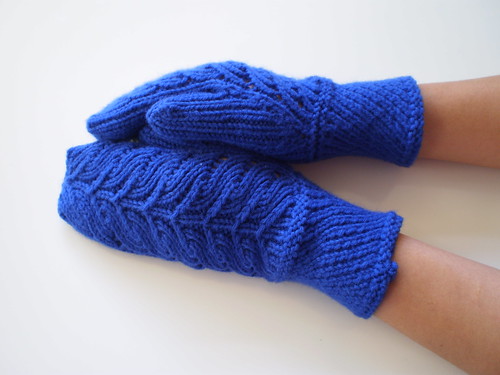
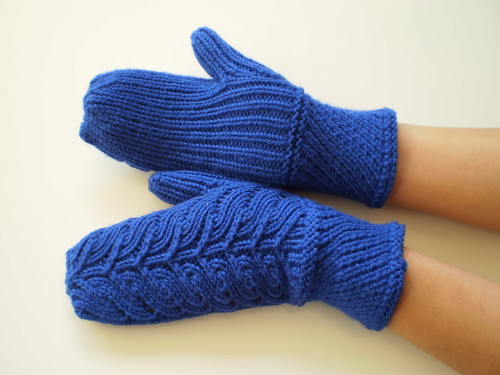
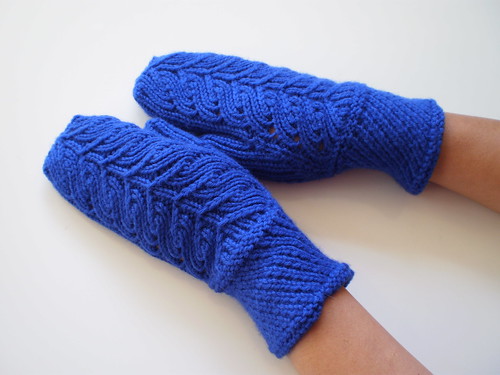
Grove Mittens

Name: Grove Mittens
Pattern: Grove Mittens by Jared Flood
Made for me :)
Size: One size
Start date: August 19, 2009
Completed date: August 25, 2009
Needle size: US 6 / 4.0 mm
Yarn: Cascade Yarns 220 Wool
How much? 1 skein = 220.0 yards (201.2m)
Colour: 9484 Stratosphere
See it on Ravelry!

Made this to go with my Laurel hat! It was an uphill battle, but I think I won in the end! I didn't check the gauge (which is a bad habit, but I never do) and the mittens were extremely tight when they were on the needle. They were also poorly shaped and weirdly long (they reminded me of hot dog buns for some reason). I wasn't very happy with them and kept thinking about how I could turn my frown upside down with these mittens. I even tried lining the mittens, but that didn't work out so well either. Thankfully blocking did miracles to these gloves, and now I actually like them!


Tip: The chart in the pattern is very tiny, so what I did was scanned the chart (you can also take a picture of it) and cropped it so it was just the left mitten or the right mitten chart by itself. I then printed each chart so that it was as large as a 8.5 by 11 page. It was so much easier to see and I just highlighted each row as I was done knitting it.

Modifications: Made the cuff a bit bigger than instructed in the pattern. I did k2tog instead of k2tog through the back loops. When I did them through the back loop the stitches were going in the opposite direction of where they needed to go. Used kitchener stitch to bind off instead of using the three needle method.

Errata: I think there should be a change in marker placement. Work to the end of row 49. Remove marker, slip one stitch to right needle with yarn in the back, and then put the marker back on the needle.

Blocking:The mittens turned out a bit small (and I have really small hands!). Oh well, nothing blocking and stretching can’t fix. We’ll see how blocking does. I might try knitting with 4.5mm needle next time (serves me right for not checking the gauge and relying on blocking to fix any problems). What I did was cut out one side of the mitten chart when I was done and traced it on a piece of cardboard (this piece was a bit bigger than my hands and definitely alot bigger than the finished knitting piece). Soaked the mitten, and then used a towel to get rid of excess water. Blocked it over the piece of cardboard, and the result is perfect pair of mittens! I should of used a piece of plastic to block the mittens instead of cardboard. I didnt have any plastic, so the cardboard was just fine! I would have thrown these mittens in the garbage can if it weren't for blocking. Blocking saved the day :)


Friday, August 21, 2009

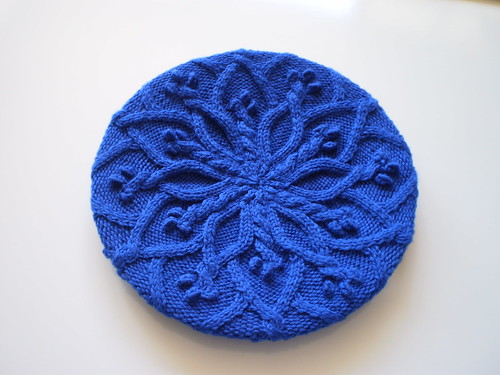
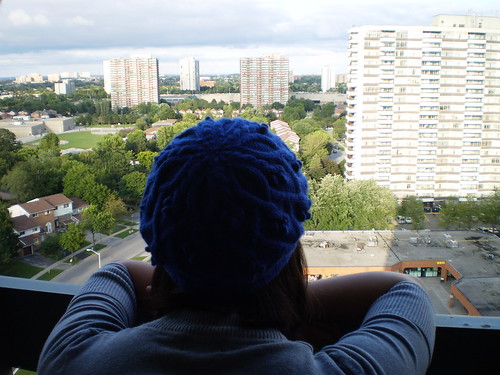
Laurel


Name: Laurel
Pattern: Laurel by Jared Flood (from Made in Brooklyn by Jared Flood)
Craft: Knitting
Made for me :)
Size: 10.5 inch diameter
Start date: August 17, 2009
Completed date: August 19, 2009
Needle size: US3/3.25mm and US7/4.5mm
Yarn: Cascade Yarns 220 Wool
How much? 1 skein = 220.0 yards (201.2m)
Colour: 9484 Stratosphere
See it on Ravelry!


I am such a huge fan of Jared Flood! I love his work and the patterns he designs. I find them to be very intricate, yet the design and patterns are simple. When I found out that he was releasing a booklet with Classic Elite Yarn, I knew I had to get my hands on it asap! Before the released date, I was calling all the yarn stores near me to see which stores will be caring it. I was heartbroken when I was told by store after store that they will not be carrying his book. I was also shocked, it's not like I live in a little town so I don't have access to lots of stores...I live in Toronto and non of the stores I called were carrying it. So then I decided to search the internet for it. Again, more hurdles. Shipping to Canada was $15 for some of the sites. Why would I pay $15 for shipping for a tiny book (smaller than a magazine) that cost $18? Thankfully, I found it on Webs for $20 (including the shipping cost to Canada)!

I was so ecstatic when the book arrived. It was like an early Christmas for me! I knew that I had to cast on this hat instantly. I was obsessively knitting this hat for two days because I couldn't wait to see the finished product and I couldn't wait to cast on other projects in the book.

I have knitted lots of his designs, so I had very high standards for Jared. I was a bit disappointed when I was knitting this hat. Was there not an editor or a test knitter? Was I the first to knit this pattern? There were lots of little gaps and minor things that were overlooked in the pattern. I kept notes as I found them, and here they are:
  1. Row 1: pattern states m1-l, but there’s no description about how to do this in the abbreviations, so I just did m1 (which is instructed in the abbreviations).
  2. The cable on row 8, row 12, etc. There’s no description on how to do this in the glossary, but you can look at the picture and guess what to do (send me a msg if u can’t guess)
  3. Marker placement will change at the end of:
  • row 15 (not row 16)
  • row 17 (not row 18)
  • row 32 (not 33) should be worked as instructed for row 18 (not what is written in the pattern)
  • row 34 (not row 35) should be worked as instructed for row 16 (not what is written in the pattern)
  • row 46 (not row 47)
  • row 53 is the last row (even though the pattern states there’s a row 54, it is the instruction for row 53)
Nonetheless, I was very happy in the end. This hat was a beautiful design. Probably one of my favourite Jared Flood designs. I used a 10.5 inch dinner plate to block this hat. I can't wait to wear this in the winter time!

As soon as this was done, I had to cast on the Grove mittens. I'm done knitting the left mitten now, so stay tuned! But here is a little sneak peak...


Wednesday, August 19, 2009

Vine and Leaf Beret


Name: Vine and Leaf Beret
Pattern: #11 Vine and Leaf Beret by Angela Hahn (from Vogue Knitting Fall 2009)
Craft: Knitting
Made for Susan
Size: Small
Start date: August 11, 2009
Completed date: August 16, 2009
Needle size: US3/3.25mm
Yarn: Debbie Bliss Baby Cashmerino
How much? 2 skeins-274.0 yards (250.5m)
Colour: 340100
See it on Ravelry!


When I saw the cover for Vogue Knitting Fall 2009, I knew I had to make the hat. I was out buying the yarn, and Susan was there. Susan is big fan of beret and she instantly fell in love with yarn. Seeing how much she loved it, I couldn't help but offer to knit her the hat. We bought a winter white colour for her, and a red for me.

The yarn was beautiful to work with. It is butter soft. It didn't split or pile. Just an absolute dream! The design was also very easy to follow and understand. After knitting, I soaked the hat in warm/cool water. Squeezed out the water by rolling the hat in a towel. Then, I used a 10.5 inch dinner plate to block the hot. Be careful not to stretch the brim when you are placing the hat over the plate. I love blocking with a dinner plate because it resulted in the perfect size and shape for the hat! Can't wait til the fall so we can start wearing our hats!

Thursday, August 13, 2009

Baby Girasole


Name: Baby Girasole
Pattern: Girasole by Jared Flood
Craft: Knitting
Made for Alba
Size made: Baby blanket (42 inch diameter)
Start date: July 22, 2009
Completed date: August 11, 2009
Needle size: US6/4.0mm and US8/5.0mm
Yarn: Bernat Baby Sport
How much?
1 skeins = 350 grams= 1113.0 yards (1017.7m)
Colour: 21742 Caribbean Sea
Modifications: Used a bigger needle (US8/5.0mm) to cast off
See it on Ravelry!


People were not kidding when they said this is a fun knit. It was such a pleasure knitting up this baby blanket. The pattern was very easy to follow, easy to memorize, and lead to an amazing finished product (if I do say so myself)! I used the magic loop method, so I wouldn't have a couple of needles trying to poke me in the eyes. If you have never tried the magic loop method, I highly recommend it! I used to be afraid of knitting in rounds before this, but never again. Try searching Youtube for magic loop videos, that was how I learned the magic loop method.


The first couple of charts in this pattern were quick to knit, but as you get further out into the blanket, the knitting slowed down quite a bit. With the increase in stitches, at times it felt forever to finish a row or two. The border took forever; I think it was the part of the blanket that took the longest for me. I think there was a small mistake in the pattern. For the lace edging, I think row 6 should be: bind off 3 sts, K2 (instead of K3 like the pattern suggests), K2togE.I used 4.0mm needles knit my blanket. When I got to the border, I switched to a 5.0mm needles to cast off. I'm a tight knitter, and this prevented the cast off being too tight which would cause the blanket to bunch. The blanket is supposed to be light and airy, so the last thing I wanted was a stiff and tight border!


When knitting was complete, the next hurdle was to block the blanket. Luckily, I had made a circular blanket just a while back so I knew exactly how to block this. I laid out a few towels to soak up the water as the blanket was drying. What I didn't like about the blanket when I was done knitting was that the outer part of the blanket was "ruffle-y". I wanted a nice flat circular blanket, no ruffles please! Luckily blocking was able to correct that. What I did was find a area in my room large enough to block this on the floor. Place the blanket in the center of the towels and used a measuring tape to stretch the radius of the blanket so that it would be 21 inches all around. By stretching it out, I was able to get rid of the ruffles so that the blanket was a nice and flat. With blocking, I was able to create a perfect circle from my blanket and when it was completely dry it took on that shape!


I also loved working with Bernat Baby Sport. It's not the most luxurious yarn to knit with (no duh, it's acrylic), but it gets the job done! I also think it is very durable for a baby blanket- it doesn't fuzz whatsoever. The best part was, it was around $7 for a skein of this and one skein was able to make a whole blanket! And how amazing is the colour! Overall, this was an extremely fun knit and I highly recommend it (as I do for all of Jared Flood's patterns- that boy is a knitting genius)! I recently purchased Jared Flood's new book (Made in Brooklyn), so stay tuned...I will be knitting lots of patterns from this new book in the near future!


Wednesday, July 15, 2009

Cotton Candy Quilt

Name: Cotton Candy Quilt
Pattern: Sock Yarn Blanket by Shelly Kang
Size: 34 inches by 39 inches
Craft: Knitting
Made for Alba
Start date: June 20, 2009
Completed date: July 14, 2009
Needle size: US6/4.0mm and US8/5.0mm
Yarn: Bernat Baby Jacquards
How much? 3.5 skeins, 350 gram, 1211.0 yards (1107.3m)
Colour: 06130 Boys & Girls
Yarn: Bernat Baby Sport Solid
How much? 0.43 skeins, 150 grams, 478.6 yards (437.6m)
Colour: Rosey Posey
Modifications: 1. Cast on 41 sts 2. Made the squares horizontally so that the final product is a rectangle (I didn'tlike the zig zag arrangement in the original pattern) 3. Added ruffle border

See it on Ravelry!

After knitting the Vivian sweater, I wanted a relaxing and mindless knit. I had a stash of these Baby Jacquard yarn in the closet and I couldn't wait to get started. I won't get into how much I love this yarn because I feel like I am always declaring my love for this yarn. Jim bought me this stash last year when Baby Jacquards were first released in Canada. I love knitting in garter stitch- easy, fast, mindless, and the results are amazing! I love how squishy and plushy the blanket is. I had a wonderful weekend sitting at the cottage staring at the lake while I was making this. It was pure bliss. Doesn't hurt that my cute boyfriend was sitting beside me either!


What I did for this blanket was cast on 41 sts. On the wrong side, I would knit across. On the right side, I would knit to the stitch before the middle stitch and K3tog, and then knit to the end. I did this until there was only 1 st left on the needle. Do not cut the yarn and just pick up/cast on so that you have the next 41 sts for the next square. The yarn changed colours on its own, so there was very little weaving in the end to hide the loose ends.

This blanket was a pleasant and mindless knit until I got to the border. When I got to the border, I tried out several options and they all turned out really bad. I tried borders with little hearts, i-cord borders, and lacy borders. I also had to decided whether to continue using Baby Jacquards or find a solid yarn that would match with this. This was a struggle for 2-3 days of knitting. At one point, I felt defeated. I had come along so far with this blanket, but I just couldn't put the finishing touches on it to make it a beautiful blanket. My mom even suggested that I put the blanket away and "just forget about it". I just couldn't and knew that I had to persevere.


I finally found a border that works perfectly with this blanket. I have to say, the border definitely made the blanket and it was well worth the struggle. I used a solid pink yarn that matched the blanket. I love the ruffle border- it is so girly and sweet. This border consumed so much yarn, but the end result was well worth it!

Overall, I am thrilled with how this turned out. I can't wait to see Alba crawling on it one day.

Sunday, June 28, 2009

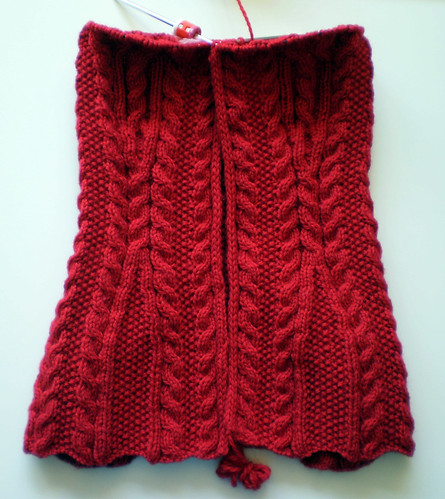
Vivian Sweater

Name: Little Red Vivian
Pattern: Vivian by Ysolda Teague
Craft: Knitting
Made for me :)
Start date: May 5, 2009
Completed date: June 18, 2009
Needle size: US8/5.0mm

Yarn: Cascade Eco+
How much? 3 skeins = 1434.0 yards (1311.2m)
Colour: 8450 (which is the perfect red)
Modifications: 1. Increased hood length 2. Slightly changed pattern for hood 3. Buttons instead of zipper
See it on Ravelry!

When I first saw this sweater, I thought it looked really interesting and intricate to knit, but for some reason I had no interest in making this sweater. I however did a 180 when I realized that this sweater was seamless. I hate sewing things together and I was curious as to how this sweater could be made without any seams. I quickly bought the yarn so I could cast on!

This was my first time knitting with Cascade Ecological. I love Cascade 220, so I have been very curious to try out Cascade Ecological. I was kind of afraid to knit with red because I have read that others have found the dye to rub off on their hands and knitting needles. That did not happen to me at all. Not even a slight tint of pink anywhere. I was pretty happy with this yarn. However, I did find that it fuzzed a bit when I was knitting. Hopefully it won't fuzz much with wash and wear. I found that this sweater "grew" a bit after washing it and blocking it. So if anyone is making a garment with Cascade Ecological, it's fine if it is a bit tight when you are knitting it, you can easily stretch it into the shape and size you want. Overall, I was happy with the Cascade Ecological and would use it again for future projects.

Back to the pattern...Wow, what can I say? Ysolda is a genius! This sweater was knit in one piece and all the cables traveled throughout the sweater seamlessly. I was afraid to make any modifications to such a complex sweater because I was afraid I would mess it up. I knit the whole sweater to completion and realized that the hood was way too short and way too small. So what I did was increased the hood length by 32 rows. For row 51 of the hood (which was row 83 for me), I did k2tog instead of p2tog to have the cables continue and decreasing the seed pattern. I thought it would be prettier to have the cables travel all around the hood instead of the seed pattern and having the cables end out of nowhere.

I also decided to do seeded band with buttons instead of a zipper closure. I really wanted a zipper closure because I wanted to find the perfect ribbon to add to the inside of my sweater. However, as stated earlier, I hate sewing so I decided to do this instead. I thought the seeded band went well with the sweater, so I opted for that instead of a ribbed band. I just picked up stitches along the sides of the front and the hood to knit it in one piece. Worked seeded stitch for 4 rows. On the 5th row, I cast off two sts where I wanted the buttons to be. On the 6th row, I cast on 2 sts where I had cast off 2 sts on the previous row. Knit in seed pattern for row 7-9. Cast off on row 10 in seeded pattern. I decided on black buttons because I love how it "pops" with the red.

Overall, I think this will be one of my favourite sweaters. The sweater is perfect for cold summer nights at the cottage or on snowy winter days. It was an interesting knit, so I was never bored. Who knows, I might have to make another one :)